EMQX Broker writing
MQTT is a popular IoT data transfer protocol. EMQX is an open-source MQTT Broker software. You can write MQTT data directly to TDengine without any code. You only need to setup "rules" in EMQX Dashboard to create a simple configuration. EMQX supports saving data to TDengine by sending data to a web service and provides a native TDengine driver for direct saving in the Enterprise Edition. Please refer to the EMQX official documentation for details on how to use it.).
Prerequisites
The following preparations are required for EMQX to add TDengine data sources correctly.
- The TDengine cluster is deployed and working properly
- taosAdapter is installed and running properly. Please refer to the taosAdapter manual for details.
- If you use the emulated writers described later, you need to install the appropriate version of Node.js. V12 is recommended.
Install and start EMQX
Depending on the current operating system, users can download the installation package from the EMQX official website and execute the installation. After installation, use sudo emqx start or sudo systemctl start emqx to start the EMQX service.
Note: this chapter is based on EMQX v4.4.5. Other version of EMQX probably change its user interface, configuration methods or functions.
Create Database and Table
In this step we create the appropriate database and table schema in TDengine for receiving MQTT data. Open TDengine CLI and execute SQL bellow:
CREATE DATABASE test;
USE test;
CREATE TABLE sensor_data (ts TIMESTAMP, temperature FLOAT, humidity FLOAT, volume FLOAT, pm10 FLOAT, pm25 FLOAT, so2 FLOAT, no2 FLOAT, co FLOAT, sensor_id NCHAR(255), area TINYINT, coll_time TIMESTAMP);
Configuring EMQX Rules
Since the configuration interface of EMQX differs from version to version, here is v4.4.3 as an example. For other versions, please refer to the corresponding official documentation.
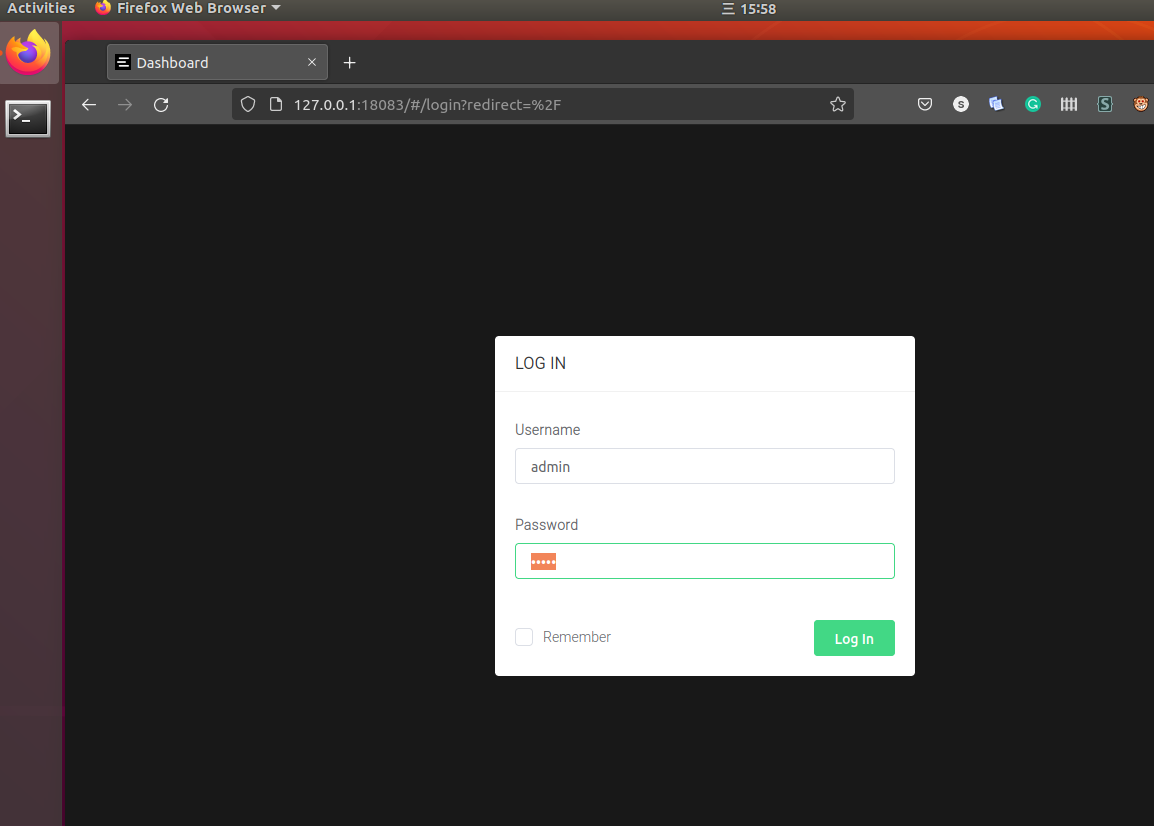
Login EMQX Dashboard
Use your browser to open the URL http://IP:18083 and log in to EMQX Dashboard. The initial installation username is admin and the password is: public.
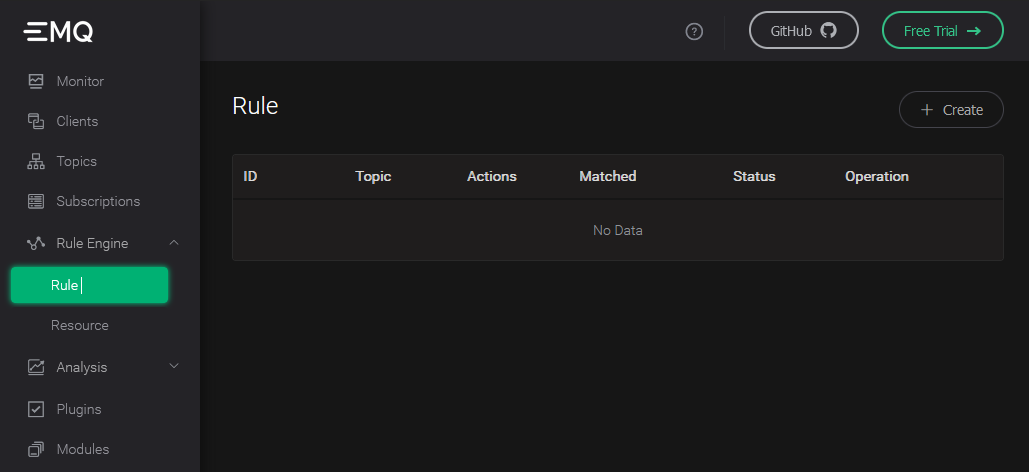
Creating Rule
Select "Rule" in the "Rule Engine" on the left and click the "Create" button: !
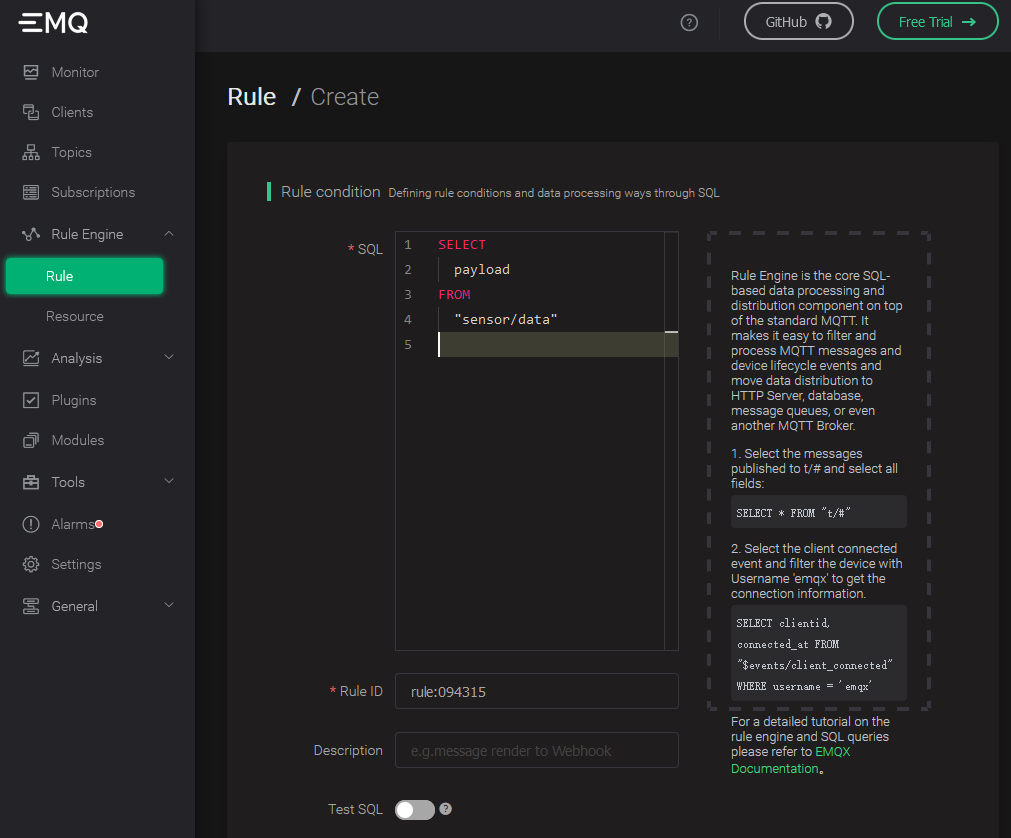
Edit SQL fields
Copy SQL bellow and paste it to the SQL edit area:
SELECT
  payload
FROM
  "sensor/data"
Add "action handler"
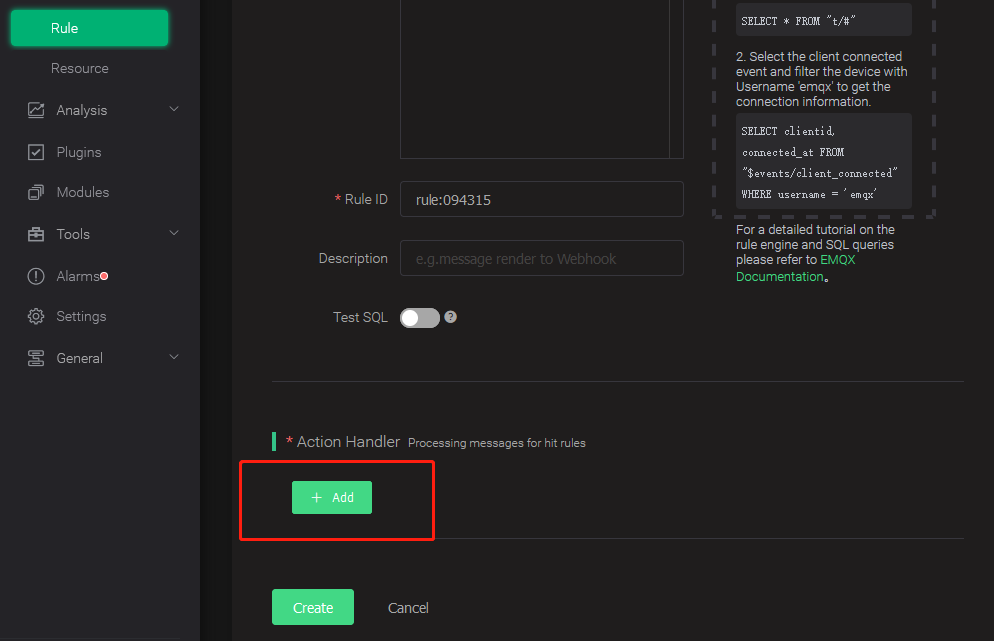
Add "Resource"
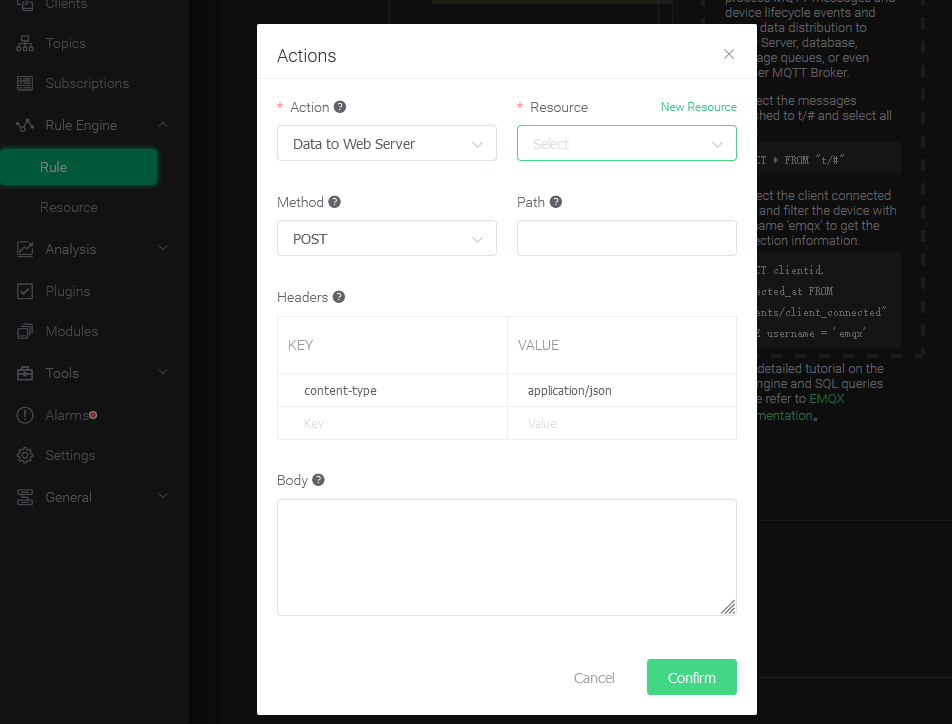
Select "Data to Web Service" and click the "New Resource" button.
Edit "Resource"
Select "WebHook" and fill in the request URL as the address and port of the server running taosAdapter (default is 6041). Leave the other properties at their default values.
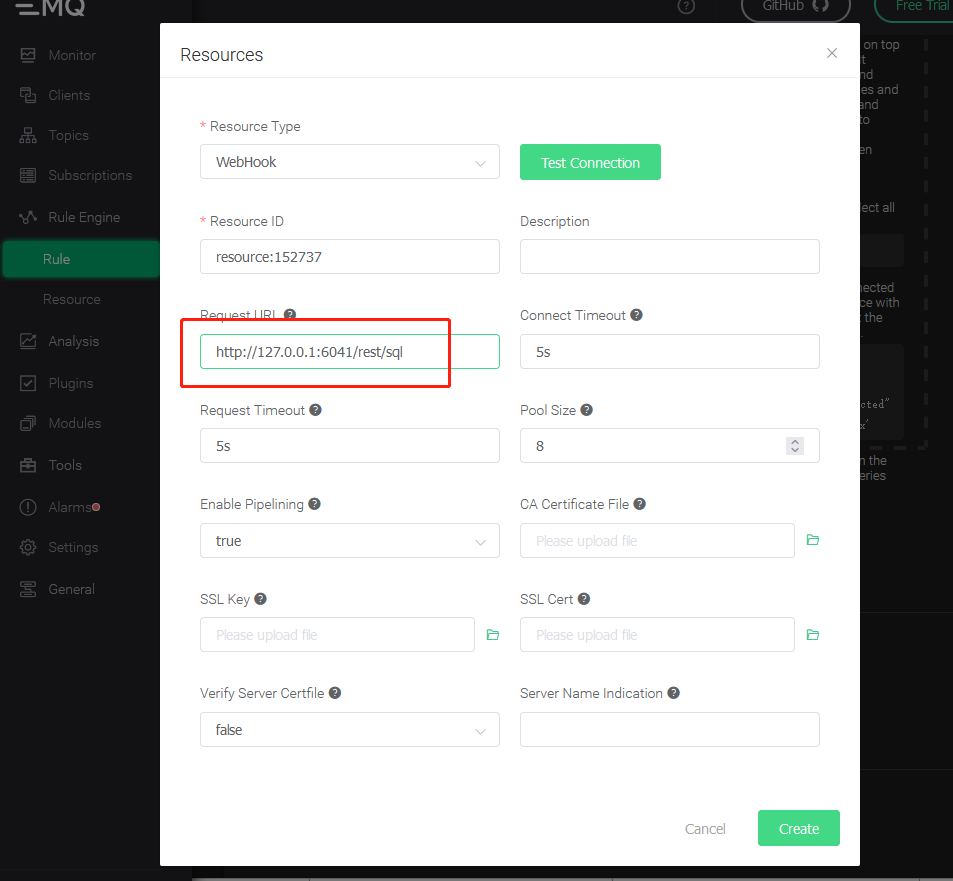
Edit "action"
Edit the resource configuration to add the key/value pairing for Authorization. If you use the default TDengine username and password then the value of key Authorization is:
Basic cm9vdDp0YW9zZGF0YQ==
Please refer to the TDengine REST API documentation for the authorization in details.
Enter the rule engine replacement template in the message body:
INSERT INTO test.sensor_data VALUES(
  now,
  ${payload.temperature},
  ${payload.humidity},
  ${payload.volume},
  ${payload.PM10},
  ${payload.pm25},
  ${payload.SO2},
  ${payload.NO2},
  ${payload.CO},
  '${payload.id}',
  ${payload.area},
  ${payload.ts}
)
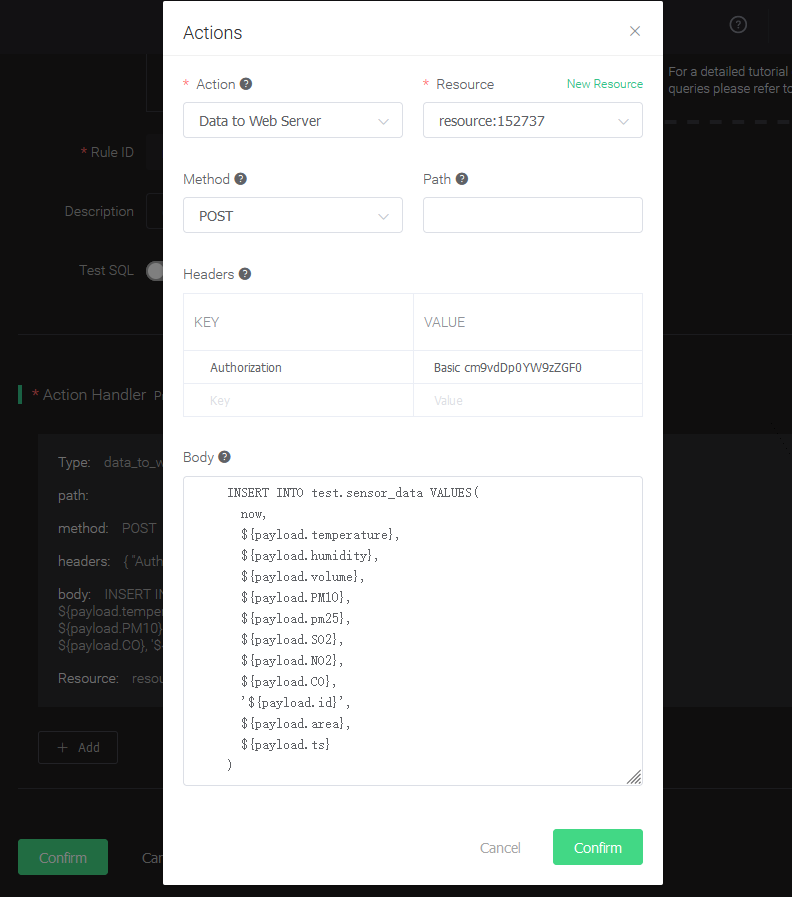
Finally, click the "Create" button at bottom left corner saving the rule.
Compose program to mock data
// mock.js
const mqtt = require('mqtt')
const Mock = require('mockjs')
const EMQX_SERVER = 'mqtt://localhost:1883'
const CLIENT_NUM = 10
const STEP = 5000 // Data interval in ms
const AWAIT = 5000 // Sleep time after data be written once to avoid data writing too fast
const CLIENT_POOL = []
startMock()
function sleep(timer = 100) {
  return new Promise(resolve => {
    setTimeout(resolve, timer)
  })
}
async function startMock() {
  const now = Date.now()
  for (let i = 0; i < CLIENT_NUM; i++) {
    const client = await createClient(`mock_client_${i}`)
    CLIENT_POOL.push(client)
  }
  // last 24h every 5s
  const last = 24 * 3600 * 1000
  for (let ts = now - last; ts <= now; ts += STEP) {
    for (const client of CLIENT_POOL) {
      const mockData = generateMockData()
      const data = {
        ...mockData,
        id: client.clientId,
        area: 0,
        ts,
      }
      client.publish('sensor/data', JSON.stringify(data))
    }
    const dateStr = new Date(ts).toLocaleTimeString()
    console.log(`${dateStr} send success.`)
    await sleep(AWAIT)
  }
  console.log(`Done, use ${(Date.now() - now) / 1000}s`)
}
/**
 * Init a virtual mqtt client
 * @param {string} clientId ClientID
 */
function createClient(clientId) {
  return new Promise((resolve, reject) => {
    const client = mqtt.connect(EMQX_SERVER, {
      clientId,
    })
    client.on('connect', () => {
      console.log(`client ${clientId} connected`)
      resolve(client)
    })
    client.on('reconnect', () => {
      console.log('reconnect')
    })
    client.on('error', (e) => {
      console.error(e)
      reject(e)
    })
  })
}
/**
* Generate mock data
*/
function generateMockData() {
 return {
   "temperature": parseFloat(Mock.Random.float(22, 100).toFixed(2)),
   "humidity": parseFloat(Mock.Random.float(12, 86).toFixed(2)),
   "volume": parseFloat(Mock.Random.float(20, 200).toFixed(2)),
   "PM10": parseFloat(Mock.Random.float(0, 300).toFixed(2)),
   "pm25": parseFloat(Mock.Random.float(0, 300).toFixed(2)),
   "SO2": parseFloat(Mock.Random.float(0, 50).toFixed(2)),
   "NO2": parseFloat(Mock.Random.float(0, 50).toFixed(2)),
   "CO": parseFloat(Mock.Random.float(0, 50).toFixed(2)),
   "area": Mock.Random.integer(0, 20),
   "ts": 1596157444170,
 }
}
Note: CLIENT_NUM in the code can be set to a smaller value at the beginning of the test to avoid hardware performance be not capable to handle a more significant number of concurrent clients.
Execute tests to simulate sending MQTT data
npm install mqtt mockjs --save ---registry=https://registry.npm.taobao.org
node mock.js
Verify that EMQX is receiving data
Refresh the EMQX Dashboard rules engine interface to see how many records were received correctly:
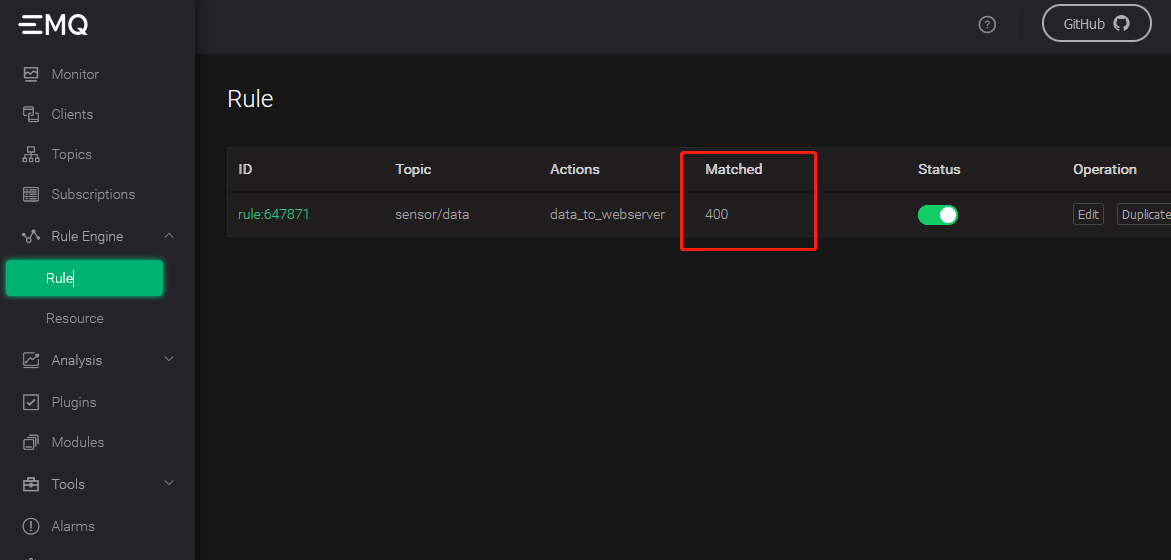
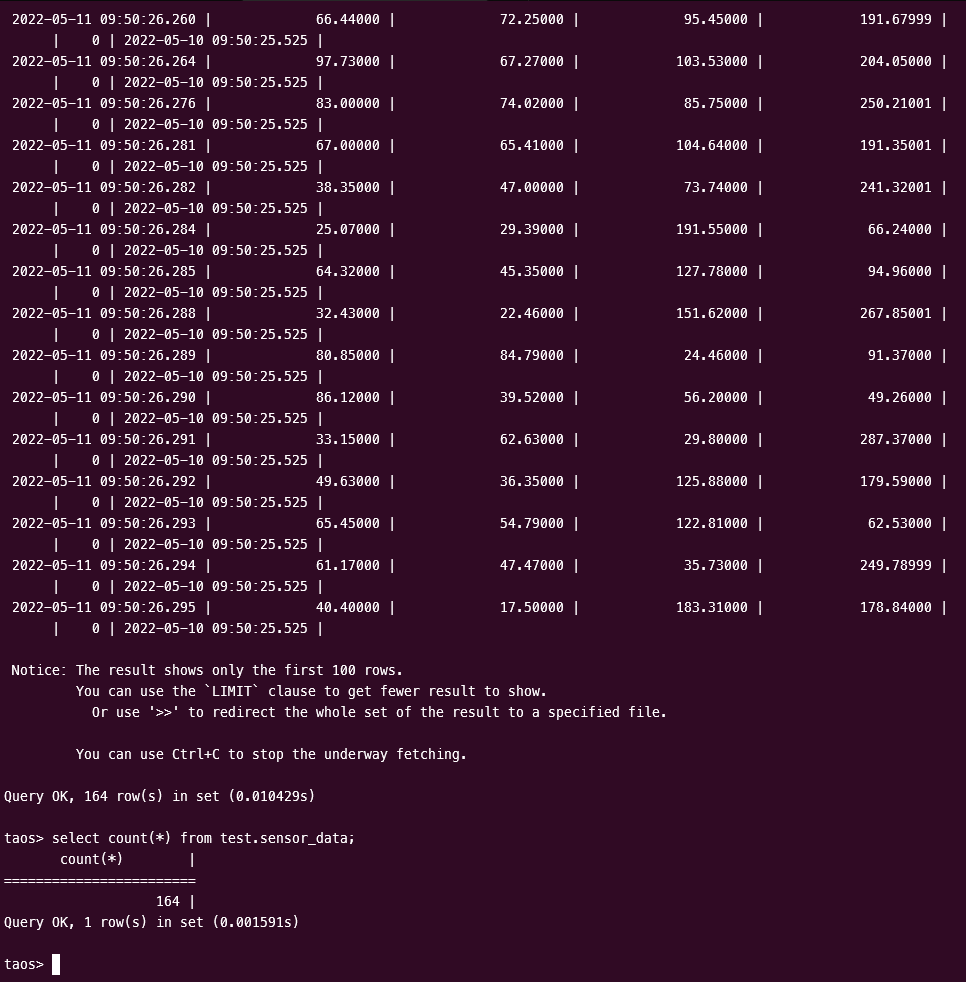
Verify that data writing to TDengine
Use the TDengine CLI program to log in and query the appropriate databases and tables to verify that the data is being written to TDengine correctly:
EMQX Please refer to the EMQX official documentation for details on how to use EMQX.