AVEVA Historian
The features or components discussed in this document are available in TDengine TSDB-Enterprise only. TDengine TSDB-OSS does not include these features or components.
This section describes how to create data migration/data synchronization tasks through the taosExplorer interface, migrating/synchronizing data from AVEVA Historian to the current TDengine cluster.
Feature Overview
AVEVA Historian is an industrial big data analytics software, formerly known as Wonderware. It captures and stores high-fidelity industrial big data, unleashing constrained potential to improve operations.
TDengine can efficiently read data from AVEVA Historian and write it into TDengine, enabling historical data migration or real-time data synchronization.
Procedure
Add a Data Source
- In a web browser, open taosExplorer. This interface is located on port 6060 on the hostname or IP address running TDengine.
- In the main menu on the left, click Data In and then click Add Task.
- In the Name field, enter a unique name for the data ingestion task.
- From the Type drop-down list, select AVEVA Historian.
- (Optional) If this data ingestion task requires an agent, select the agent from the Agent drop-down list. You can also click Create New Agent to create the agent now.
For more information, see Install taosX-Agent.
- From the Target DB drop-down list, select the database in which you want to store data ingested by this task. You can also click Create Database to create the database now.
Configure Connection Information
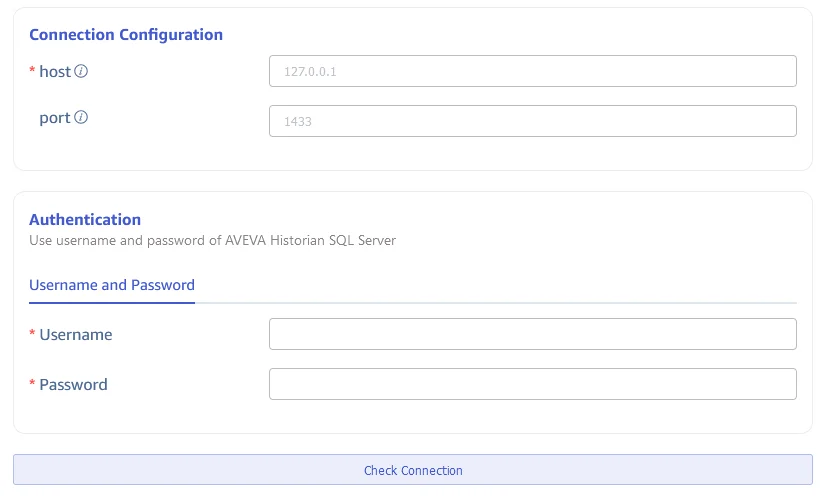
In the Connection Configuration area, fill in the Server Address and Server Port.
In the Authentication area, fill in the Username and Password.
Click the Connectivity Check button to check if the data source is available.
Configure Collection Information
Fill in the collection task related configuration parameters in the Collection Configuration area.
Migrate Data
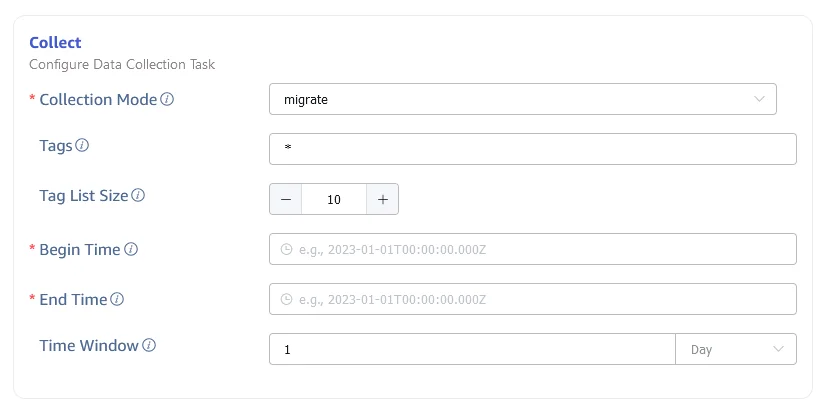
If you want to perform data migration, configure the following parameters:
Select migrate from the Collection Mode dropdown list.
In Tags, fill in the list of tags to migrate, separated by commas (,).
In Tag Group Size, fill in the size of the tag group.
In Task Start Time, fill in the start time of the data migration task.
In Task End Time, fill in the end time of the data migration task.
In Query Time Window, fill in a time interval, the data migration task will divide time windows according to this interval.
Synchronize Data from the History Table
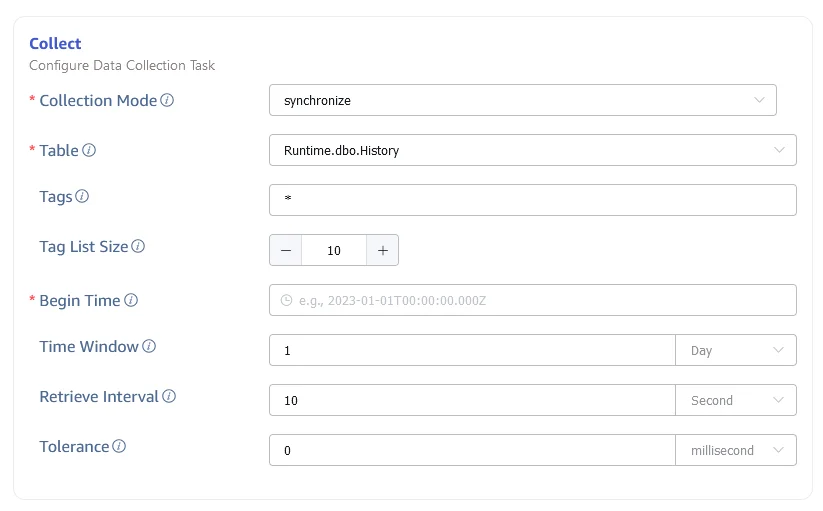
If you want to synchronize data from the Runtime.dbo.History table to TDengine, configure the following parameters:
Select synchronize from the Collection Mode dropdown list.
In Table, select Runtime.dbo.History.
In Tags, fill in the list of tags to migrate, separated by commas (,).
In Tag Group Size, fill in the size of the tag group.
In Task Start Time, fill in the start time of the data migration task.
In Query Time Window, fill in a time interval, the historical data part will divide time windows according to this interval.
In Real-time Synchronization Interval, fill in a time interval, the real-time data part will poll data according to this interval.
In Disorder Time Upper Limit, fill in a time interval, data that enters the database after this time during real-time data synchronization may be lost.
Synchronize Data from the Live Table
If you want to synchronize data from the Runtime.dbo.Live table to TDengine, configure the following parameters:
Select synchronize from the Collection Mode dropdown list.
In Table, select Runtime.dbo.Live.
In Tags, fill in the list of tags to migrate, separated by commas (,).
In Real-time Synchronization Interval, fill in a time interval, the real-time data part will poll data according to this interval.

Configure Data Mapping
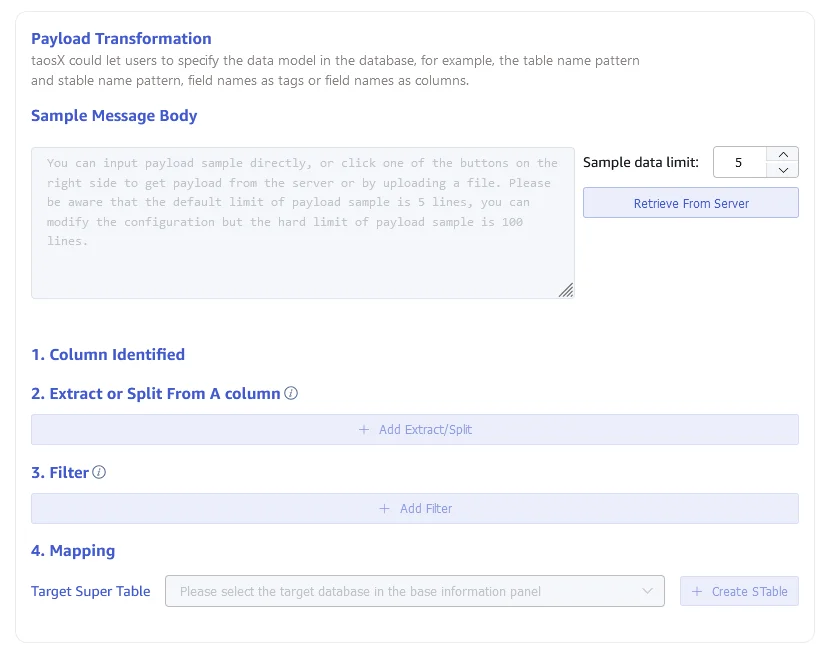
Fill in the data mapping related configuration parameters in the Data Mapping area.
Click the Retrieve from Server button to fetch sample data from the AVEVA Historian server.
In Extract or Split from Column, fill in the fields to extract or split from the message body, for example: split the vValue field into vValue_0 and vValue_1, select the split extractor, fill in the separator as ,, and number as 2.
In Filter, fill in the filtering conditions, for example: enter Value > 0, then only data where Value is greater than 0 will be written to TDengine.
In Mapping, select the supertable in TDengine to which you want to map, as well as the columns to map to the supertable.
Click Preview to view the results of the mapping.
Configure Advanced Options
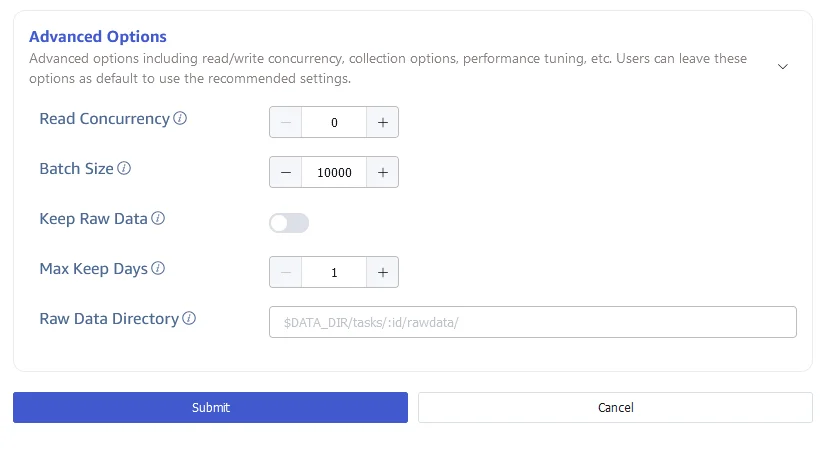
Fill in the related configuration parameters in the Advanced Options area.
Set the maximum read concurrency in Maximum Read Concurrency. Default value: 0, which means auto, automatically configures the concurrency.
Set the batch size for each write in Batch Size, that is: the maximum number of messages sent at once.
In Save Raw Data, choose whether to save the raw data. Default value: No.
When saving raw data, the following two parameters are effective.
Set the maximum retention days for raw data in Maximum Retention Days.
Set the storage path for raw data in Raw Data Storage Directory.
Configure Exception Handling
The Exception Handling Strategy section is collapsed by default. Click > to expand it.
The common strategies are:
- Archive: Write the invalid data to an archive file, by default under
${data_dir}/tasks/<id>/<datetime>, without writing it to the target database. Archive files are used for troubleshooting: only the first batch is kept for each failure reason in the same archive file, and the total number of invalid rows is reported by the task monitoring metrics. Use thetaosx archivecommand to inspect archive files. - Discard: Ignore the invalid data.
- Error: Report an error.
- Cache: For a target connection failure or resource shortage, write data to a cache file and ingest it after the target recovers.
You can configure strategies for these conditions:
- Target connection timeout: Archive, discard, error, or cache.
- Target database does not exist: Archive, discard, or error.
- Table does not exist: Archive, discard, error, or create the table automatically and retry.
- Primary timestamp out of range (
now - keep1throughnow + 100y): Archive, discard, or error. - Primary timestamp is null: Archive, discard, error, or use the current time.
- Composite primary key is null: Archive, discard, or error.
- Table name exceeds 192 characters: Archive, discard, error, truncate, or truncate and archive.
- Invalid table-name characters, such as
.: Archive, discard, error, or replace invalid characters with a configured string. - Null table-name template variable: Discard, leave the variable empty, or replace it with a configured string.
- Column does not exist: Archive, discard, error, or add the missing column automatically and retry.
- Column name exceeds 64 characters: Archive, discard, or error.
- Column value exceeds its defined length: Archive, discard, error, truncate, or truncate and archive. Automatic Column Expansion can alter the table and retry instead.
- Other data errors: Archive, discard, or error.
Additional settings include:
- Connection Timeout: Target connection timeout in seconds, from
1through600. - Temporary Storage Location: A path relative to
${data_dir}/tasks/<id>/. - Archive Retention Days: A nonnegative integer;
0means unlimited. - Archive Available Space: From
0through65535;0means unlimited. - Archive Location: A path relative to
${data_dir}/tasks/<id>/. - Archive Write Failure Strategy: Delete old files, discard the data, or report an error and stop the task.
Completion of Creation
Click the Submit button to complete the creation of the task. After submitting the task, return to the Data Writing page to view the status of the task.