Pulsar Tuya
The features or components discussed in this document are available in TDengine TSDB-Enterprise only. TDengine TSDB-OSS does not include these features or components.
This section describes how to create a data migration task through the Explorer interface to migrate data from Pulsar-Tuya cluster to the current TDengine TSDB cluster.
Feature Overview
Apache Pulsar is a cloud-native open-source distributed messaging and stream processing platform. Pulsar-Tuya is a cluster customized by Tuya based on the open-source Apache Pulsar.
TDengine TSDB can efficiently read data from Pulsar-Tuya and write it to TDengine TSDB to achieve historical data migration or real-time data ingestion.
Procedure
Add a Data Source
- In a web browser, open TDengine TSDB Explorer. This interface is located on port 6060 on the hostname or IP address running TDengine TSDB.
- In the main menu on the left, click Data In and then click Add Task.
- In the Name field, enter a unique name for the data ingestion task.
- From the Type drop-down list, select Pulsar-Tuya.
- (Optional) If this data ingestion task requires an agent, select the agent from the Agent drop-down list. You can also click Create New Agent to create the agent now.
For more information, see Install taosX-Agent.
- From the Target DB drop-down list, select the database in which you want to store data ingested by this task. You can also click Create Database to create the database now.
Configure Connection Information
Broker Server, for example: mqe.tuyaus.com:6650.
Only one valid broker server address needs to be filled in.

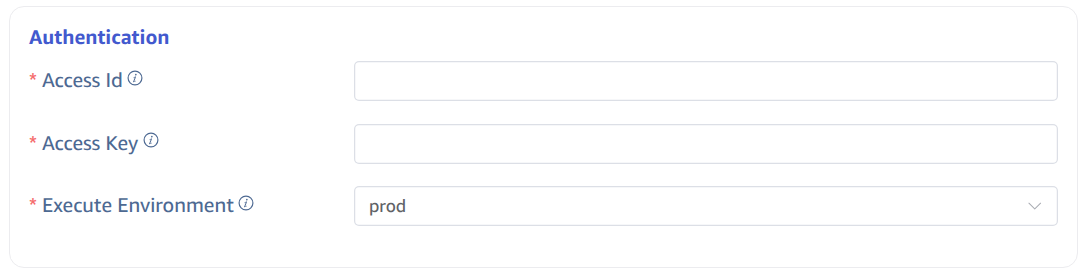
Authentication Mechanism
Here you need Tuya platform-specific authentication information. Fill in the Access Id and Access Key provided by the platform and select the corresponding execution environment.
Configure Collection Information
Fill in the configuration parameters related to the collection task in the Collection Configuration area. The topics, consumer names, and subscription names required by Pulsar will be automatically generated based on the Access Id and Access Key provided by the Tuya platform. You only need to configure the following information:
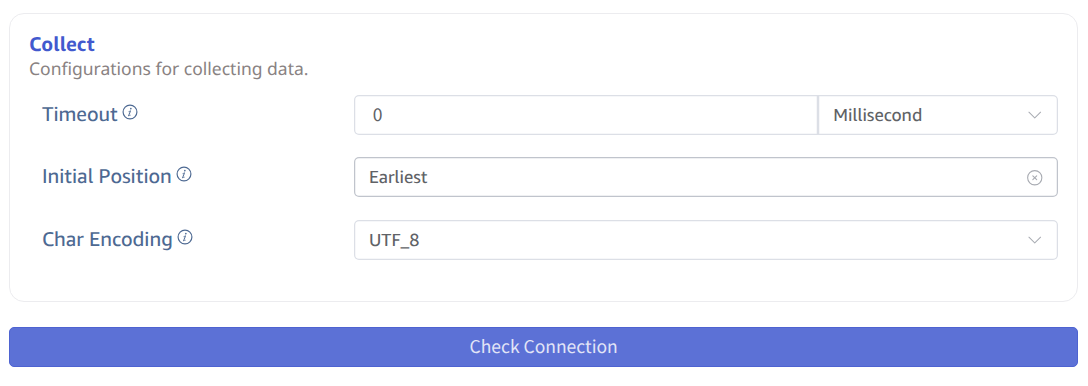
Fill in the timeout time in Timeout. When no data can be consumed from Pulsar for more than the timeout period, the data collection task will exit. The default value is 0 ms. When timeout is set to 0, it will wait indefinitely until data is available or an error occurs.
Select the position from which to start consuming data in the Initial Position dropdown list. There are two options: Earliest, Latest. The default value is Earliest.
- Earliest: Used to request the earliest position.
- Latest: Used to request the latest position.
In Character Encoding, configure the message body encoding format. When taosX receives a message, it uses the corresponding encoding format to decode the message body to obtain the original data. Options include UTF_8, GBK, GB18030, BIG5, with UTF_8 as the default.
Click the Connectivity Check button to check if the data source is available.
Configure Payload Parsing
Fill in the configuration parameters related to Payload parsing in the Payload Parsing area.
Parsing
There are three methods to obtain sample data:
Click the Retrieve from Server button to get sample data from Pulsar-Tuya.
Click the File Upload button to upload a CSV file and obtain sample data.
Enter sample data from the Pulsar message body in Message Body.
JSON data supports JSONObject or JSONArray, and the following data can be parsed using a JSON parser:
{"id": 1, "message": "hello-world"}
{"id": 2, "message": "hello-world"}
or
[{"id": 1, "message": "hello-world"},{"id": 2, "message": "hello-world"}]
The parsing results are shown as follows:
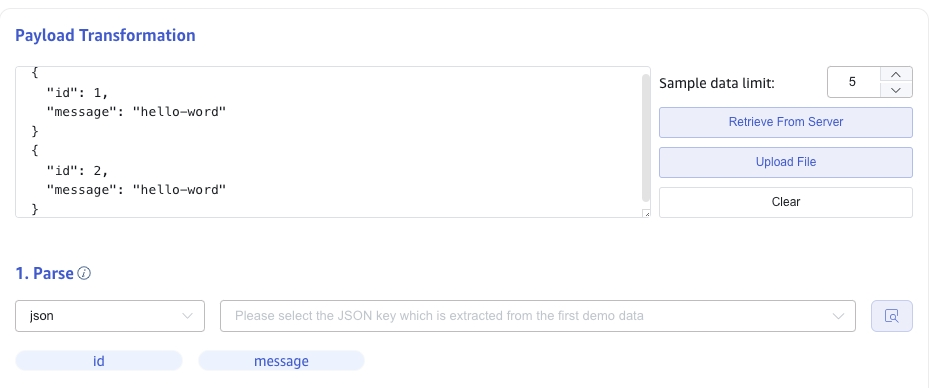
Click the magnifying glass icon to view the preview parsing results.

Field Splitting
In Extract or Split from Columns, fill in the fields to extract or split from the message body, for example: split the message field into message_0 and message_1, select the split extractor, fill in the separator as -, and number as 2.
Click Add to add more extraction rules.
Click Delete to delete the current extraction rule.

Click the magnifying glass icon to view the preview extraction/splitting results.

Data Filtering
In Filter, fill in the filtering conditions, for example: enter id != 1, then only data with id not equal to 1 will be written to TDengine.
Click Add to add more filtering rules.
Click Delete to delete the current filtering rule.
Click the magnifying glass icon to view the preview filtering results.
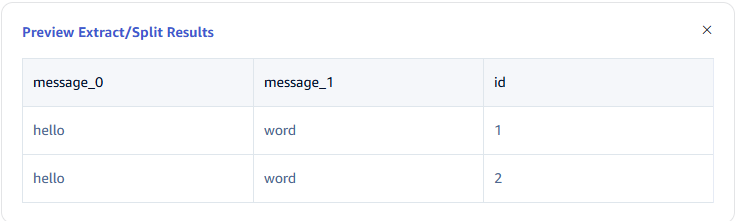
Table Mapping
In the Target Supertable dropdown, select a target supertable, or click the Create Supertable button on the right.
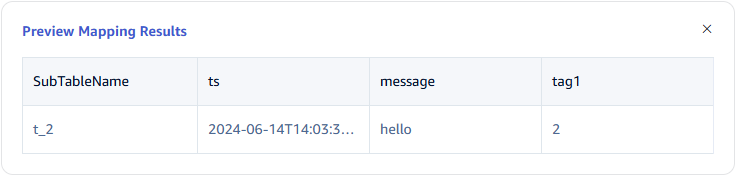
In the Mapping section, fill in the name of the subtable in the target supertable, for example: t_{id}. Fill in the mapping rules as required, where mapping supports setting default values.

Click Preview to view the results of the mapping.
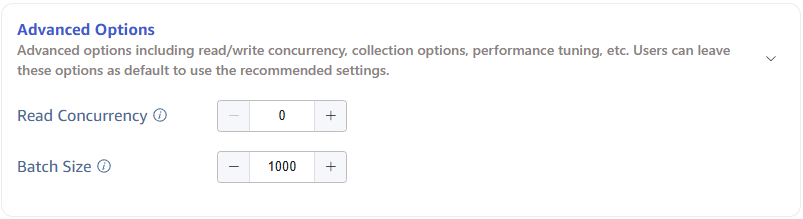
Configure Advanced Options
The Advanced Options area is collapsed by default, click the > on the right to expand it, as shown below:

Completion of Creation
Click the Submit button to complete the creation of the Pulsar-Tuya to TDengine data synchronization task. Return to the Data Source List page to view the status of the task execution.