pSpace
The features or components discussed in this document are available in TDengine TSDB-Enterprise only. TDengine TSDB-OSS does not include these features or components.
This section describes how to create data migration/data synchronization tasks through the Explorer UI to migrate/synchronize data from pSpace to the current TDengine TSDB cluster.
Feature Overview
TDengine TSDB can efficiently read data from pSpace and write it to TDengine TSDB for historical data migration or real-time data synchronization.
Procedure
Add a Data Source
- In a web browser, open TDengine TSDB Explorer. This interface is located on port 6060 on the hostname or IP address running TDengine TSDB.
- In the main menu on the left, click Data In and then click Add Task.
- In the Name field, enter a unique name for the data ingestion task.
- From the Type drop-down list, select pSpace.
- (Optional) If this data ingestion task requires an agent, select the agent from the Agent drop-down list. You can also click Create New Agent to create the agent now.
For more information, see Install taosX-Agent.
- From the Target DB drop-down list, select the database in which you want to store data ingested by this task. You can also click Create Database to create the database now.
Configure Connection and Authentication Information
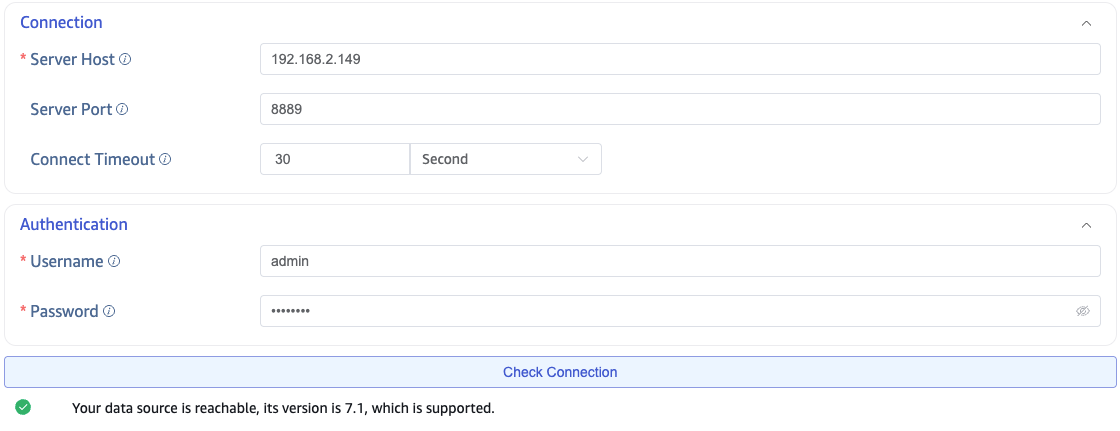
In the Connection Configuration section, fill in Server Address and Server Port.
In the Authentication section, fill in Username and Password.
Click Connectivity Check to verify whether the data source is available.
Configure Data Points
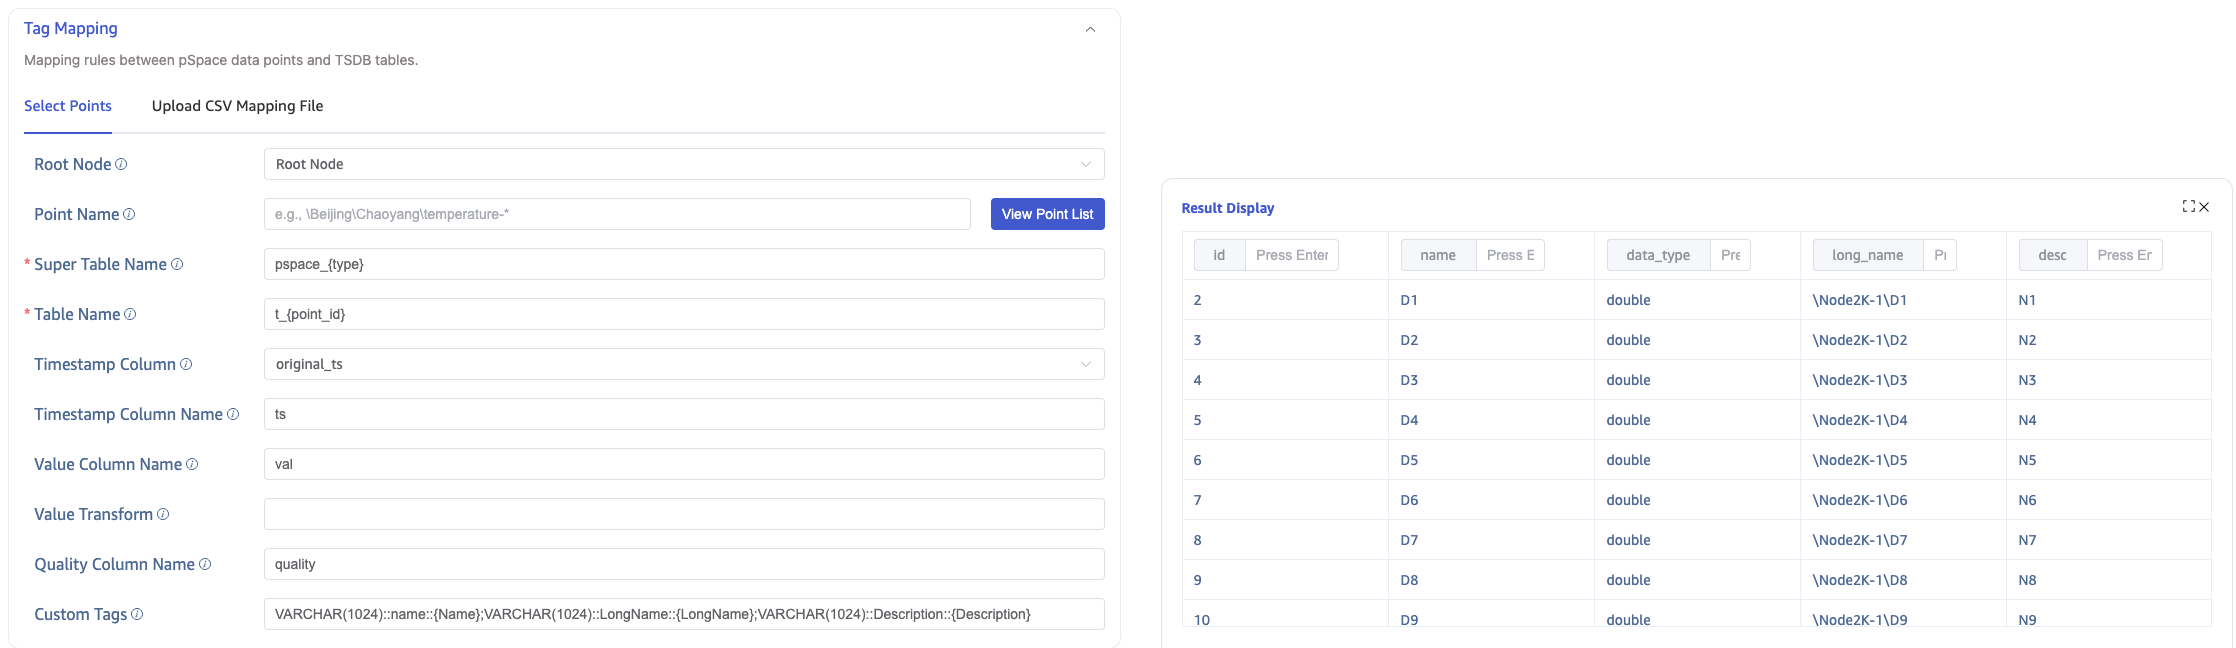
Select Data Points
In Data Points, configure the following items:
- Root Node (root): The root node to start traversal from. Enter the LongName of the root node. For example:
\Beijing\Chaoyang\Wangjingmeans traversal starts from\Beijing\Chaoyang\Wangjingand proceeds downward. By default, traversal starts from the root node. - Data Point Name (point_name_pattern): Supports filtering by the LongName of data points. For example:
\Beijing\Chaoyang\Wangjing\temperature-*means all data points under\Beijing\Chaoyang\Wangjingwhose names start with "temperature-". - Super Table Name (super_table_expression): Specifies the super table name for writing data points. Supports the
{type}placeholder. Example:pspace_{type}. - Table Name (child_table_expression): Specifies the subtable name for writing data points. Supports the
{point_id}placeholder. Example:t_{point_id}. - Timestamp Column (table_primary_key): Selects the source of the primary timestamp in the target table. Available values are
original_ts,request_ts, andreceived_ts. - Timestamp Column Name (table_primary_key_alias): Specifies the timestamp column name in the target table. Default is
ts. - Value Column Name (value_col): Specifies the column name for collected values in the target table. Default is
val. - Value Transform (value_transform): Applies an expression transform to values before writing. Example:
(val-32)/1.8. - Quality Column Name (quality_col): Specifies the data quality column name in the target table. Default is
quality. - Custom Tags (custom_tags): Configures tag mappings written to subtables. Supports static values and dynamic extraction from point attributes (for example,
{LongName}).
After configuring Root Node and Data Point Name, click View Data Point List to view matching data points, then continue configuring the remaining mapping rules.
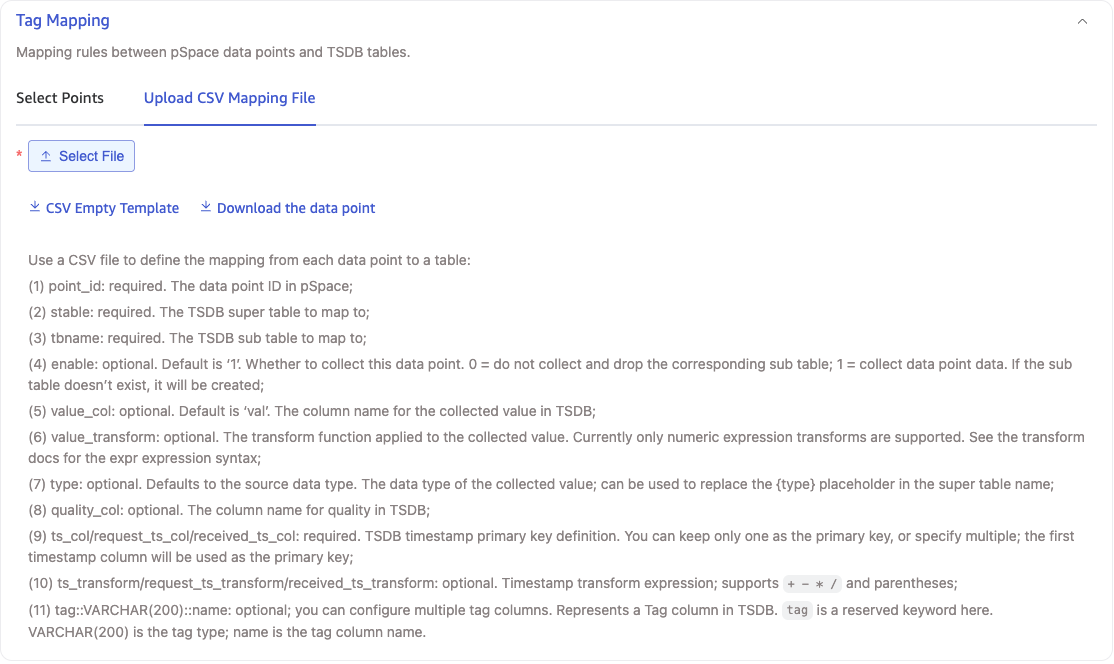
Upload CSV Configuration File
In Upload CSV Configuration File, click Download Data Points, select the required Root Node and Data Point Name, and a CSV configuration file will be generated and downloaded locally. Modify the generated CSV file as needed and upload it again.
Configure Collection
In the Collection Configuration section, fill in collection-related parameters.
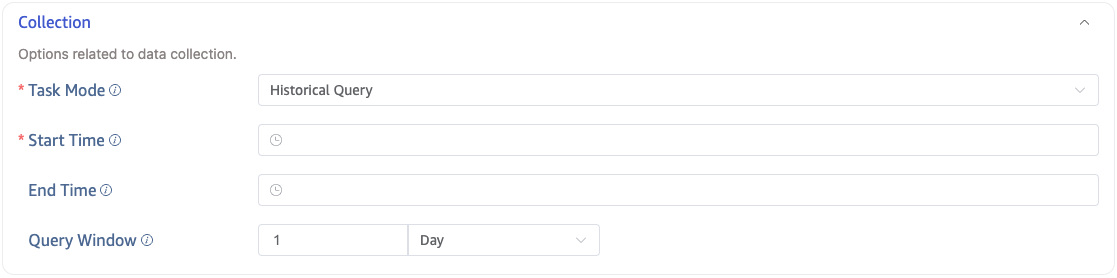
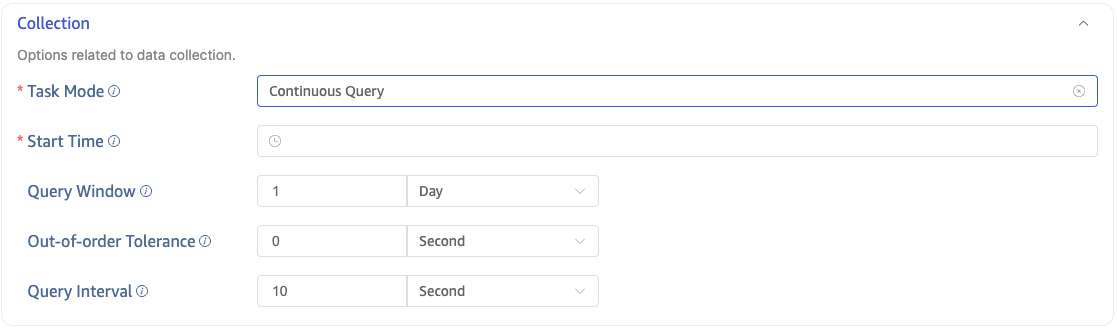
pSpace supports three collection modes: Historical Query, Real-time Subscription, and Query Sync.
- Historical Query: Batch query historical data within a time range. The task ends after the query completes.
- Real-time Subscription: Subscribes to real-time changes of data points and keeps running until canceled.
- Query Sync: Completes historical data migration first, then continuously polls new data at a fixed interval.
Historical Query
Select Historical Query mode and configure: Start Time, End Time, and Query Window.
Real-time Subscription
Select Real-time Subscription mode. No additional parameters are required.
Query Sync
Select Query Sync mode and configure: Start Time, Query Window, Out-of-order Tolerance, and Query Interval.
Configure Advanced Options
In the Advanced Options section, configure other parameters as needed.
Complete Creation
Click Submit to complete task creation. After submitting, return to the Data In page to view the task status.
Limitations
- While a pspace data in task is running, if the point list changes(add or remove data points) in pSpace, you must manually restart this data-in task; otherwise, data from newly added points may not be correctly synchronized to TDengine TSDB.