KingHistorian
The features or components discussed in this document are available in TDengine TSDB-Enterprise only. TDengine TSDB-OSS does not include these features or components.
This section describes how to create data migration/data synchronization tasks through the Explorer interface to migrate/synchronize data from KingHistorian to the current TDengine TSDB cluster.
Function Overview
TDengine TSDB can efficiently read data from KingHistorian and write it into TDengine TSDB to achieve historical data migration or real-time data synchronization.
Procedure
Add a Data Source
- In a web browser, open TDengine TSDB Explorer. This interface is located on port 6060 on the hostname or IP address running TDengine TSDB.
- In the main menu on the left, click Data In and then click Add Task.
- In the Name field, enter a unique name for the data ingestion task.
- From the Type drop-down list, select KingHistorian.
- (Optional) If this data ingestion task requires an agent, select the agent from the Agent drop-down list. You can also click Create New Agent to create the agent now.
For more information, see Install taosX-Agent.
- From the Target DB drop-down list, select the database in which you want to store data ingested by this task. You can also click Create Database to create the database now.
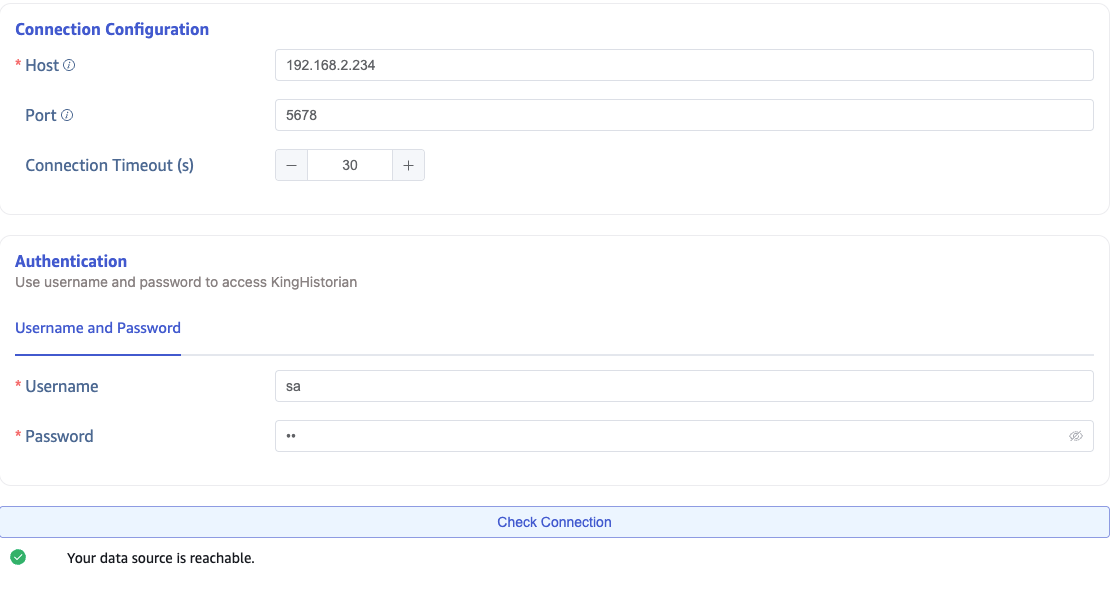
Configure Connection Information
Fill in the Server Address and Server Port in the Connection Configuration area.
Fill in the Username and Password in the Authentication area.
Click the Connectivity Check button to check if the data source is available.
Configure Tags
In the Upload CSV Configuration File, click Download Data Points, then select the required Point Group, Points, and Tags. This action generates a CSV configuration and downloads it locally. Modify the generated CSV configuration file as needed and re-upload it.

Configure Collection Information
Fill in the relevant configuration parameters for the collection task in the Collection Configuration area.
Historical Data Migration
If you want to perform historical data migration, configure the following parameters:
Fill in the start time of the data migration task in Task Start Time.
Fill in the end time of the data migration task in Task End Time.
Fill in a time interval in Query Window. The data migration task will divide the time window according to this interval.
Fill in a time interval in Out-of-Order. Each query window will backtrack this interval.
Fill in a time interval in Query Interval. There will be a waiting interval between each query window.

Real-Time Data Synchronization
If you want to perform real-time data synchronization, configure the following parameters:
Fill in a time interval in Minimum Interval Time, which is the minimum subscription interval time.

Configure Advanced Options
Configure any additional settings in the Advanced Options area as needed.
Completion
Click the Submit button to complete the task creation. After submitting the task, return to the Data Writing page to view the task status.